
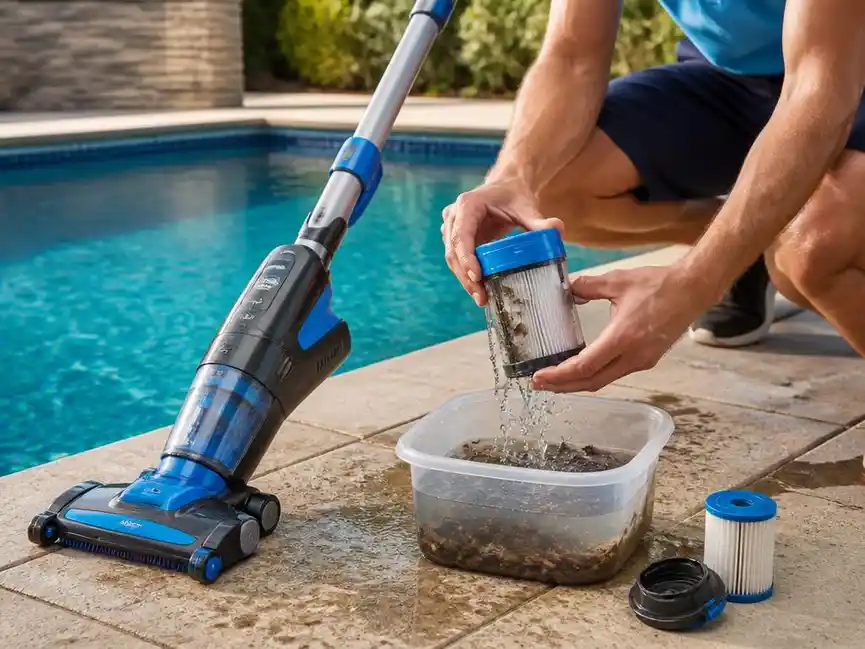
Owning a premium pool cleaner like the water tech volt ensures your swimming sessions remain hygienic and crystal clear throughout the hot summer. This advanced battery-powered device offers unprecedented cordless convenience, picking up leaves, fine sand, and twigs from the pool floor with minimal effort on your part.
However, even the most efficient pool equipment requires consistent care to sustain its original cleaning power and long-term durability. By following these practical maintenance steps, you will easily preserve your vacuum’s health, protect your financial investment, and enjoy a sparkling pool all year long.
Understanding the water tech volt battery system
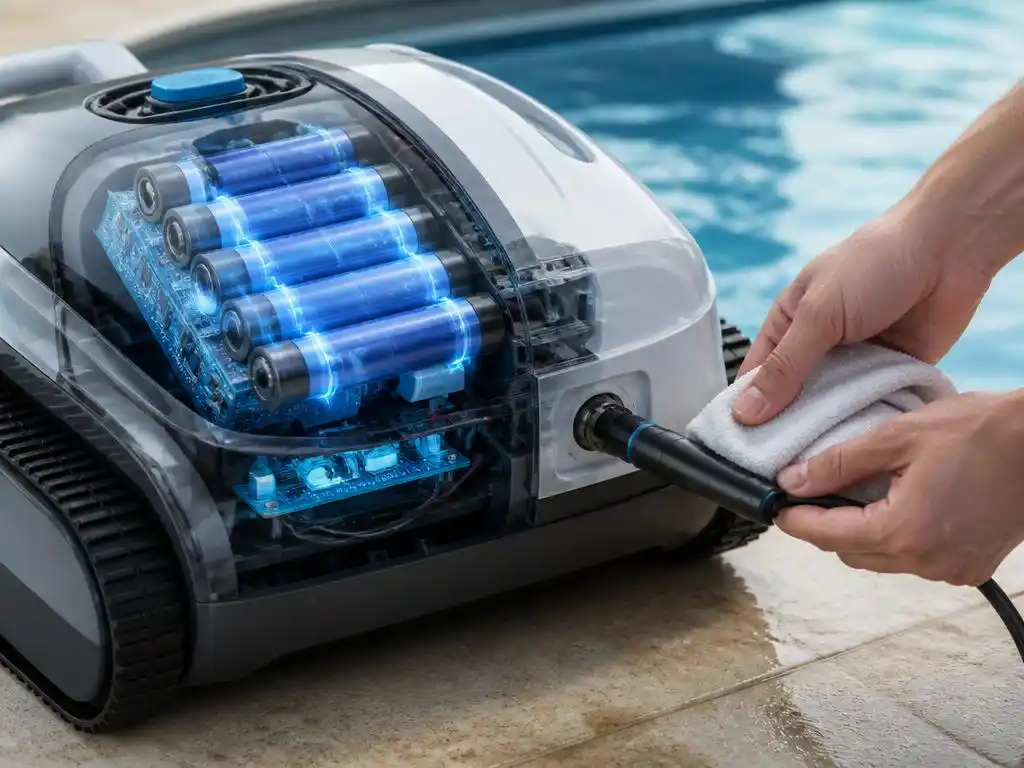
The internal battery is the heart of your specialized vacuum, supplying the steady power required to capture heavy debris. Using high-quality lithium-ion batteries allows these cordless machines to deliver consistent suction performance from the start of your cleaning cycle until the very end. However, proper charging habits are absolutely critical to prevent premature cell degradation.
You should always make sure the charging port is completely dry before connecting your device to the electrical outlet. Water droplets inside the charging jack can cause short circuits, permanently damaging the internal electronics beyond repair. Taking a few seconds to wipe the connections dry preserves the charging integrity of your pool cleaner.
💡Pro Battery Tips
- Never leave the charger connected for more than twenty-four consecutive hours.
- Charge the unit inside a cool, dry area away from direct, harsh sunlight.
- Keep the protective cap securely placed over the port during underwater operations.
Additionally, avoid discharging the battery fully during every single cycle, as deep discharges can strain the internal chemistry. Recharge the unit as soon as you notice a significant drop in water flow or suction efficiency. Following these simple charging protocols ensures your cleaning companion remains highly reliable whenever debris starts accumulating.
When charging, always use the original charger supplied by the manufacturer to prevent battery voltage mismatches. Third-party chargers may seem convenient, but they often lack the precise voltage regulation needed for your vacuum. Overcharging or undercharging with incorrect equipment can lead to battery swelling or permanent loss of storage capacity.
If you notice the vacuum is running unusually hot during operation, turn it off and let it rest. Elevated operating temperatures are a clear sign that the battery or motor is working under excessive load. Allowing the machine to cool down protects the internal solder joints and prevents safety features from triggering prematurely.
Cleaning the debris chamber and filter bag
A clogged filter bag dramatically restricts water circulation, which directly reduces the overall suction power of your cleaner. After each cleaning session, it is highly recommended to empty the main chamber and thoroughly rinse the debris bag. Allowing organic matter to rot inside the collection compartment creates unpleasant odors and promotes bacterial growth.
To clean the filter bag properly, use a low-pressure garden hose to wash away fine sand, silt, and algae. Avoid using high-pressure sprayers or stiff scrub brushes, which can easily tear the delicate mesh material of the filter. Inspecting the bag regularly for small holes prevents microparticles from bypassing the collection system.
- Release the nose cap latches carefully to access the inner chamber.
- Slide the filter bag out without spilling the trapped dirt.
- Turn the bag inside out and wash thoroughly with a gentle garden hose stream.
If you notice stubborn mineral deposits or fine algae residue clinging to the mesh, soak it in warm water. Adding a mild dish soap can help loosen organic particles without damaging the synthetic fibers of the bag. Once cleaned, allow the filter to air dry completely before reassembling the unit for storage.
For pools with heavy leaf debris, consider keeping a spare filter bag on hand at all times. This allows you to quickly swap out a full bag for a clean one without interrupting your cleaning flow. Having a secondary bag also gives the first one plenty of time to dry completely before its next use.
Check the plastic frame of the filter bag for any signs of cracking or warping. A warped frame can leave gaps between the bag and the vacuum wall, allowing fine debris to escape. Replacing a damaged filter frame immediately keeps your water clean and prevents dirt from recirculating back into your pool.
Removing stubborn debris from the impeller
The impeller is responsible for pulling water through the filtration chamber, making it a critical component for suction. Over time, hair, small pine needles, and long grass can wrap around the rotating impeller shaft, causing motor resistance. If left uncleaned, this extra friction will overheat the motor, drastically shortening its operational lifespan.
To clear the impeller, carefully remove the nose cap and locate the small intake grate near the motor. Use a pair of needle-nose pliers or tweezers to gently pull out any wound-up hair or plant fibers. Ensure the vacuum is completely turned off and disconnected from any power source before performing this delicate maintenance task.
Spin the impeller gently with your fingertip to confirm it rotates freely without any friction or resistance. If you feel any grinding or stiffness, there might be sand grains trapped deep within the motor housing. Flushing the area with clean, fresh water usually dislodges these micro-abrasives, restoring smooth operation instantly.
Sometimes, small pebbles can bypass the filter and get wedged between the impeller blades, locking them in place. If the motor hums but the impeller does not spin, turn the unit off immediately to avoid burnout. Carefully dislodge the obstruction using a wooden toothpick or another non-conductive tool to protect the blades.
After clearing the impeller area, clean the surrounding intake housing to ensure there is no leftover grime. Sand and small debris can settle in these tight spaces, waiting to get sucked into the motor shaft again. A thorough rinse with clean tap water is all it takes to keep this area clean.
Troubleshooting common suction loss problems
When your pool cleaner suddenly stops collecting dirt efficiently, the cause is usually quite simple to identify and fix. Check the intake valve flap at the nose of the unit to ensure it moves back and forth freely. A stuck flap can prevent debris from entering the chamber, rendering the cleaner virtually useless.
Another common culprit is a loose connection between the vacuum head and the main body of the cleaner. Ensure all latches and pins are securely locked into place before submerging the unit into your pool. Just as the stability of an automotive operating system ensures a vehicle runs smoothly, tight seals guarantee maximum suction power.
| Observed Symptom | Potential Cause | Recommended Solution |
|---|---|---|
| Weak suction | Full filter bag | Rinse bag thoroughly |
| Motor won’t start | Depleted battery | Charge for four hours |
| Noisy operation | Impeller blockage | Clear wrapped debris |
Furthermore, always inspect the vacuum wheels and bottom brushes for signs of wear or trapped pebbles. Damaged brushes can prevent the vacuum from maintaining the correct height above the pool surface, reducing suction efficiency. Replacing worn brushes helps the machine glide effortlessly across concrete, vinyl, or fiberglass pool finishes.
If you have verified all these parts and the machine still lacks power, the battery cells may be failing. Most modern pool vacuums feature replaceable battery packs that can be swapped out without replacing the entire housing. Investing in a fresh battery pack is a cost-effective way to restore original cleaning performance.
If your vacuum turns on but lacks suction, check if the water outlet vents are blocked. These vents allow water to escape after it passes through the filter, creating the necessary vacuum pressure. Ensure no leaves or pool toys are blocking these ports, as restricted exhaust flow halts suction instantly.
Always check the pool water chemistry before operating your cordless vacuum, as highly acidic water can damage components. High chlorine or low pH levels can weaken plastic parts and degrade rubber seals over time. Maintaining balanced pool water chemistry helps protect your cleaning equipment just as much as it protects your swimming health.
Storage guidelines for the winter season
As temperatures drop and pool season ends, preparing your equipment for long-term winter storage becomes essential. Leaving your pool cleaner outside exposed to freezing temperatures will cause the internal plastic parts to become brittle. Severe cold can also permanently damage the delicate chemical balance of the lithium-ion cells inside the motor.
Before storing the unit, ensure every component is completely dry to prevent mold and mildew from forming. Wipe down the plastic casing with a dry microfiber cloth and store the parts in a temperature-controlled environment. Avoid damp basements, uninsulated garden sheds, or outdoor storage boxes that are susceptible to moisture.
Never store your battery-powered pool cleaner with a completely empty battery. Charge the battery to approximately fifty percent before putting it away for several months to preserve its long-term health.
Check on your stored pool equipment occasionally during the off-season to ensure no moisture has accumulated. If you store the unit in an airtight container, add a small silica gel packet to absorb any humidity. Taking these preventive steps ensures that your vacuum is ready to run smoothly when spring finally arrives.
Keeping your pool equipment dry during the cold season also protects the delicate electrical contact points from corrosion. Corroded contacts prevent electrical current from flowing efficiently, which can make charging difficult when you reopen your pool. A quick inspection before storage saves valuable time and frustration in the following spring.
Finally, place the storage box in a secure spot where pests cannot access the delicate components. Mice and other rodents are known to chew on rubber seals and plastic parts during the cold winter months. Storing your vacuum in a durable, sealed plastic bin keeps it safe from unwanted pests and dust.
Maximizing the life of your water tech volt seals
Watertight seals and rubber O-rings are essential for protecting the internal motor of your vacuum. Over time, exposure to chlorine, bromine, and harsh sunlight can cause these rubber components to dry out and crack. A cracked seal allows water to seep into the motor compartment, causing immediate and irreparable damage.
To prevent dry rot, apply a thin layer of silicone-based lubricants to all rubber O-rings periodically. Avoid using petroleum-based products like Vaseline, as they will degrade the rubber chemistry and cause the seals to stretch. Regular lubrication maintains the flexibility of the seals, ensuring a perfect waterproof barrier every single time.
Just as software acts as the critical engine in modern vehicle systems, these tiny rubber O-rings act as the unsung heroes of pool hardware. Check the seals for flattening, tiny tears, or discoloration every time you open the battery chamber. Replacing a worn O-ring immediately is a cheap way to avoid buying a whole new motor.
Never use force when closing the battery compartment, as this can pinch or misalign the rubber seals. If the cap does not slide into place easily, remove it and check for sand grains along the track. Wiping the sealing track clean with a soft cloth solves most alignment issues without using excessive force.
Keep spare O-rings in your pool maintenance kit so you can replace them the moment you spot wear. Over time, even well-lubricated seals will lose their elasticity due to constant exposure to pool chemicals and pressure. Having replacements ready prevents downtime and keeps your cleaning schedule running smoothly without any unexpected interruptions.
Why routine checks prevent expensive replacements
Staying proactive with your pool maintenance routine is far more economical than dealing with sudden gear failures. Small problems, like a tiny tear in a filter bag or a dry seal, can escalate quickly if ignored. Catching these minor issues early keeps your cordless pool cleaners working efficiently for many years.
Creating a simple monthly maintenance schedule helps you stay on top of these essential checkups. Note down the last time you lubricated the O-rings, cleaned the impeller, and checked the battery health. Keeping a physical or digital log ensures no critical maintenance tasks slip through the cracks during busy summer weeks.
✅Maintenance Checklist
Keep these golden rules in mind for a pristine pool cleaner:
- Always dry the charging port completely before plugging it in.
- Rinse the debris bag immediately after each cleaning cycle.
- Lubricate the rubber O-rings with silicone lubricant regularly.
Regular maintenance not only protects the machine itself but also ensures your swimming pool water remains inviting. A properly functioning vacuum removes organic debris before it can decay and fuel algae blooms, reducing your chemical costs. Therefore, maintaining your vacuum directly translates to a healthier, more balanced pool environment for your family.
Similarly, analyzing your equipment’s performance is like analyzing business metrics; a thorough review reveals hidden issues. For example, getting a local business audit helps companies identify operational weaknesses before they grow. Taking the time to audit your pool equipment prevents unexpected breakdowns when you need clean water most.
Teach everyone in your household who uses the pool vacuum how to operate and clean it properly. Incorrect handling, such as pulling the unit out of the water by its charging cord, can cause severe structural damage. Sharing basic operational knowledge ensures the machine is always handled with care, extending its physical life.
In conclusion, dedicating just ten minutes of your week to routine pool maintenance yields incredible long-term benefits. Your cordless pool vacuum will reward you with reliable suction, sparkling water, and years of trouble-free service. Protect your investment today, and enjoy the peace of mind that comes with a perfectly maintained swimming pool.
