
Web Digital
Efficiency Secrets for Mastering How to Screenshot on Mac Book
May
The beauty of the Apple ecosystem lies in its consistency and depth, offering multiple pathways to achieve the same result depending on your specific needs. Beyond simple captures, mastering the various combinations of keys and menu options empowers you to handle complex tasks, such as recording screen activity or capturing specific drop-down menus with precision. By integrating these shortcuts into your daily routine, you transition from a basic user to a power user, significantly enhancing your productivity and the professional quality of your digital outputs across all platforms.
🚀 Quick Navigation: Key Takeaways
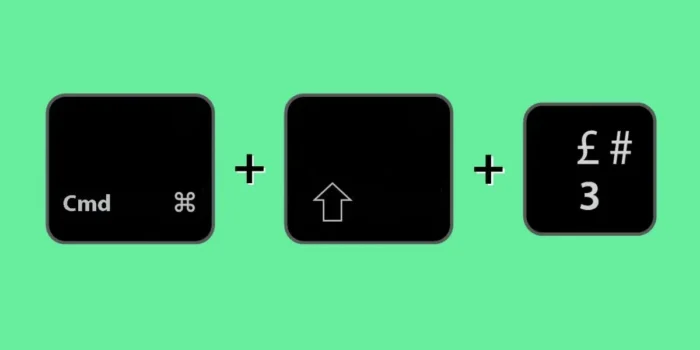
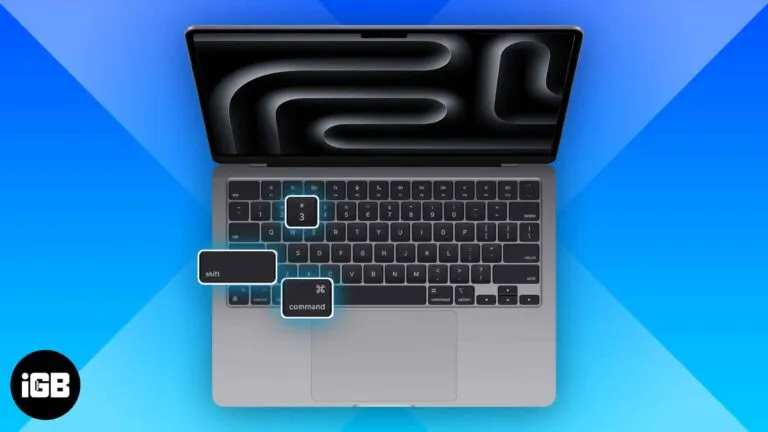
- Standard Capture: Use Command + Shift + 3 for the entire display.
- Selective Capture: Use Command + Shift + 4 for a specific area.
- The Pro Menu: Command + Shift + 5 opens the advanced screenshot toolbar.
- Copy to Clipboard: Adding the Control key allows for immediate pasting.
- Default Format: High-quality PNG files saved directly to the desktop.
Mastering the primary macbook screenshot shortcut combinations
Navigating the various keyboard commands is the first step toward efficiency. The most common macbook screenshot shortcut is the combination of Command, Shift, and the number 3. When pressed simultaneously, this command triggers the system to snap a picture of everything currently visible on your display. This is particularly useful for capturing a snapshot of your entire workspace, including the menu bar and dock, which is often necessary when providing technical support or documenting a specific system state for archival purposes.
For more granular control, the Shift + Command + 4 combination transforms your cursor into a crosshair. This allows you to click and drag to select a very specific portion of your screen. This precise selection method is the gold standard for creating tutorials or extracting specific images from a webpage without including unnecessary background clutter. Once you release the mouse button or trackpad, the image is processed and saved instantly, maintaining the high resolution and color accuracy that Apple Retina displays are famous for.
Furthermore, if you have already triggered the crosshair with Command + Shift + 4 but want to capture a specific window instead of a free-form area, you can simply press the Space bar. Your cursor will turn into a camera icon, and as you hover over different open applications, they will be highlighted in blue. Clicking the desired window captures it perfectly, including a professional-looking drop shadow that makes the image ready for immediate inclusion in a high-level presentation or a blog post.
| Action Required | Keyboard Shortcut | Best Use Case |
|---|---|---|
| Full Screen Capture | Cmd + Shift + 3 | Documenting full layouts |
| Specific Area | Cmd + Shift + 4 | Selecting individual items |
| Individual Window | Cmd + Shift + 4 + Space | Clean software screenshots |
| Screenshot Menu | Cmd + Shift + 5 | Video and advanced options |
How to screenshot on mac and paste into documents
In a fast-paced work environment, you may not always want to save a file to your desktop. Learning how to screenshot on mac and paste directly into an email or a messaging app like Slack can save you a significant amount of time and disk space. To do this, you simply add the Control key to any of the standard shortcuts. For instance, pressing Command + Shift + Control + 3 will copy the full screen to your clipboard rather than generating a file. This is an essential technique for rapid-fire feedback sessions where speed is the priority.
This “copy-to-clipboard” functionality is particularly powerful when used with the crosshair selection. By using Command + Shift + Control + 4, you can grab a snippet of code, a graph, or a design element and immediately paste it into your document using Command + V. This eliminates the need to find the file on your desktop, drag it into the application, and then delete the original file afterward. It keeps your workspace clean and your focus sharp, which is vital when managing high-volume tasks.
Moreover, the clipboard method works seamlessly with the Apple Universal Clipboard feature. If you have multiple Apple devices logged into the same iCloud account, you can take a screenshot on your MacBook and paste it onto your iPad or iPhone almost instantly. This cross-device synergy is a major advantage for professionals who use their laptop for creation but their tablet for presentation or review, allowing for a mobile and flexible workflow that adapts to your physical location.
💡 Expert Optimization Tip
If you find your desktop becoming cluttered with screenshot files, use the Command + Shift + 5 menu to change the default save location to a specific “Screenshots” folder. This keeps your main workspace tidy and makes it much easier to locate specific images later using Finder’s search or gallery view.
Advanced features of the integrated screenshot toolbar

The introduction of the Command + Shift + 5 shortcut revolutionized how users interact with their displays. This command opens a specialized toolbar at the bottom of the screen, providing a visual interface for all capture options. From here, you can select whether to record the entire screen as a video or just a specific portion. This built-in screen recording capability is invaluable for creating walkthroughs or documenting bugs that occur during a specific sequence of actions, providing much more context than a static image ever could.
The “Options” menu within this toolbar is where the true power of the system resides. Here, you can set a timer—either five or ten seconds—allowing you to arrange windows or open specific menus that would otherwise disappear the moment you press a key. This delay is essential for how to screenshot on macbook laptop users who need to capture transient UI elements like hover states or complex contextual menus that require a specific mouse position to remain active.
Additionally, you can use this menu to decide whether the mouse cursor should be visible in your capture. For professional documentation, hiding the cursor often results in a cleaner image, whereas for tutorials, showing the cursor can help guide the viewer’s eye to specific buttons or labels. The ability to toggle these settings on the fly ensures that you can customize each capture to suit its specific purpose, maintaining a high standard of visual clarity regardless of the complexity of the subject matter.
Utilizing markup for immediate image annotation
One of the most underutilized features of the macOS screenshot system is the immediate markup tool. After you take a shot, a small thumbnail appears in the bottom-right corner of your screen for a few seconds. Clicking this thumbnail opens the Markup window, providing a suite of tools to draw arrows, add text, or highlight specific areas. This allows you to provide context and clarity to your capture before it is even saved to your disk, ensuring that the recipient understands exactly what you are pointing out.
Markup is especially useful for collaborative projects. Instead of sending a plain screenshot and a long descriptive email, you can simply draw a red box around an error and add a brief text note directly onto the image. This visual communication is much more effective at reducing misunderstandings and speeding up the revision process. Once you are finished, you can click “Done” to save the edited version, or use the “Share” button to send it directly via AirDrop, Mail, or Messages without ever leaving the markup interface.
For those who prefer a non-destructive workflow, the Markup tool also allows you to crop the image or redact sensitive information using solid shapes. This is a critical security measure when sharing screenshots that might contain private emails, passwords, or financial data. By blurring or covering these areas before sharing, you protect your digital privacy while still conveying the necessary information to your team or client, upholding professional standards of data protection and confidentiality.
Caution: Sensitive Data Handling
Always verify the contents of your screenshot before sending it to others. It is easy to accidentally capture background notifications or open browser tabs that contain confidential information. Use the Markup tool to crop or black out any data that is not relevant to the recipient.
Customizing file formats and system defaults
By default, macOS saves screenshots as PNG files to preserve the highest possible image quality. While this is ideal for professional design work, these files can sometimes be quite large. For users who need to upload many images to a web platform with size restrictions, changing the default file format to JPG can be a strategic move. This adjustment requires a quick command in the Terminal application, but once set, it applies to all future captures, automatically compressing the images to a more web-friendly size without significantly degrading the visual fidelity.
To change the format, you would open Terminal and type `defaults write com.apple.screencapture type jpg`, followed by `killall SystemUIServer` to refresh the settings. This level of system-level customization is a hallmark of the Mac experience, allowing the machine to adapt to your specific professional requirements. Whether you need high-fidelity TIFF files for printing or lightweight JPGs for quick web sharing, the system is flexible enough to accommodate your needs with just a few technical adjustments.
Similarly, you can change the default filename prefix. Instead of every file starting with “Screenshot,” you can change it to “Project_Alpha” or your company name to make organization easier. This is incredibly helpful for long-term projects where you might accumulate hundreds of images over several months. By customizing these defaults, you create an automated organizational system that saves you hours of manual renaming later, allowing you to focus on the high-level aspects of your work rather than the minutiae of file management.
Troubleshooting common screen capture issues
Even with a robust system, users may occasionally encounter issues with their how to screenshot on macbook laptop workflows. One common problem is the screenshot thumbnail not appearing. This is often due to settings within the Command + Shift + 5 menu being toggled off. Re-enabling “Show Floating Thumbnail” restores the ability to quickly access Markup and Share options. If the shortcuts themselves aren’t working, a quick check of the Keyboard settings in System Settings is usually enough to verify that the shortcuts are enabled and haven’t been remapped by a conflicting application.
Another rare issue occurs when attempting to capture content from streaming services like Netflix or Apple TV+. Due to Digital Rights Management (DRM) protections, the system will often capture a black screen instead of the video content. This is a deliberate security feature intended to prevent piracy and is not a fault with your hardware. For capturing content that is protected by DRM, you would generally need specific permission from the content owner or use official promotional materials provided by the service’s media center.
If you find that your screenshots are looking blurry or distorted, ensure that you aren’t using a third-party scaling tool that interferes with the native resolution of your display. Screenshots on a Mac are taken at the “Retina” resolution by default, which means they are essentially double the size of standard images. This ensures they look crisp on high-resolution displays, but they may appear larger than expected when sent to users with standard-definition monitors. Understanding these resolution differences is key to ensuring your visual communication is effective across different hardware configurations.
Elevating your digital productivity
Developing a deep familiarity with these tools transforms how you interact with information. Instead of just viewing data, you begin to see your screen as a source of raw material that can be captured, edited, and shared in seconds. This proactive approach to digital interaction is what defines a truly modern professional. By mastering how to screenshot on mac book devices, you are essentially learning a new language of visual shorthand that makes you a more effective communicator and a more capable problem solver in any digital environment.
As you continue to explore the capabilities of your hardware, remember that these tools are designed to work for you. Don’t be afraid to experiment with different settings and shortcuts to find the combination that best suits your personal style. Whether it’s changing save locations, mastering the markup tools, or utilizing the clipboard for instant pasting, every small improvement in your workflow contributes to a more efficient and enjoyable computing experience. The Mac is a powerful instrument, and its screen capture suite is one of the many ways it helps you do your best work every single day.
Summary: The Path to Mastery
Mastering how to screenshot on mac book involves more than just memorizing keys; it’s about integrating visual capture into your workflow. From the basic Command + Shift + 3 to the advanced options in the Command + Shift + 5 menu, you now have the tools to capture, annotate, and share your screen with professional precision. Stay efficient, stay creative, and let your Mac help you tell your story.