
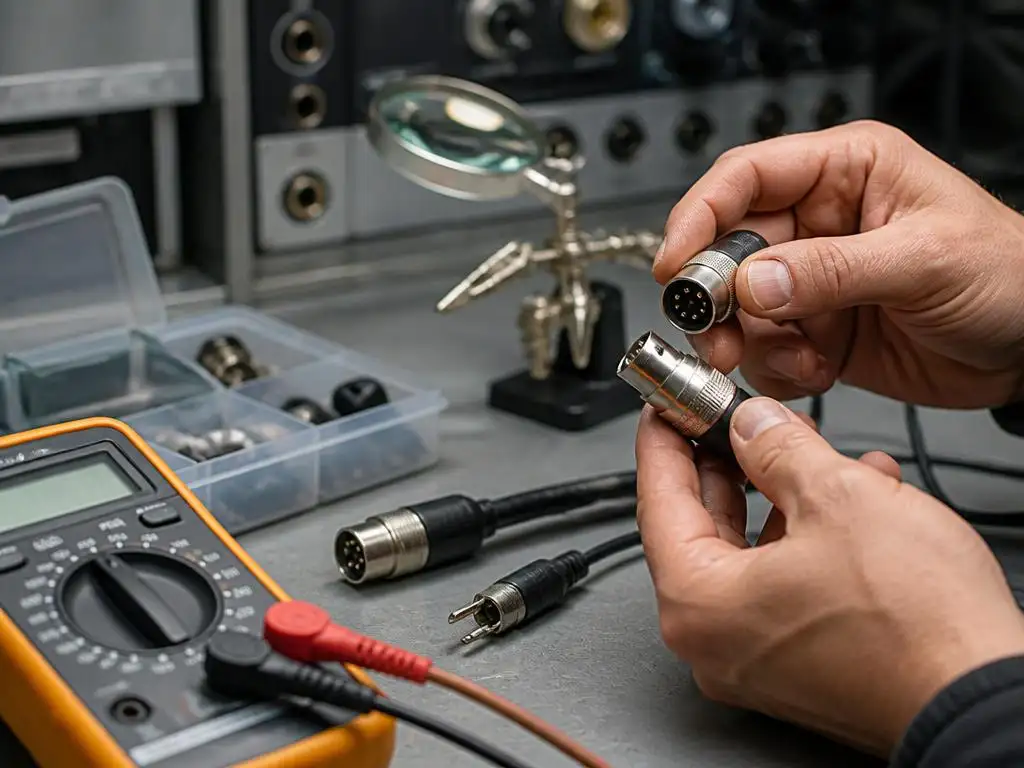
Identifying faults within DIN plug connections requires a systematic approach to diagnostics and hardware maintenance. These circular connectors, historically vital in analog audio and data transmission, often suffer from signal degradation due to oxidation or physical wear. Understanding the internal wiring architecture allows technicians to distinguish between simple cable fatigue and complex component failure. Whether you are dealing with professional studio equipment or vintage consumer electronics, establishing a clean electrical path remains the primary goal for restoration. Proper diagnostic tools, such as digital multimeters, are essential for identifying breaks in connectivity before attempting any permanent repairs or soldering procedures.
When your equipment experiences signal loss, the root cause is frequently found at the contact points rather than the cable itself. A reliable repair methodology involves visual inspection of the pin alignment and testing for continuity across the interface. Technicians should approach these legacy hardware problems with caution to avoid damaging delicate housings. If you encounter unexpected software errors during diagnostic setups, remember that network socket issues can sometimes mimic hardware faults in digitized signal chains. Maintaining a clean workspace ensures that microscopic debris does not interfere with the reassembly of sensitive pin configurations.
Why do DIN plug connections fail over time?
The primary reason for failure in these circular components is environmental exposure leading to contact corrosion. Over years of use, humidity and dust accumulate on the pins, increasing electrical resistance. Furthermore, the constant insertion and extraction cycles stress the internal solder joints, eventually leading to intermittent signal drops. Mechanical tension on the outer casing can also misalign the pins, resulting in poor physical contact that creates noise, hum, or complete failure in high-fidelity sound systems.
When testing for continuity, place your probes on the corresponding pins of the DIN interface while gently wiggling the cable near the connector. If the resistance fluctuates wildly, you have confirmed a break in the conductor or a cold solder joint inside the housing. Always document the pinout diagram for the specific standard you are working with to ensure wires are reconnected correctly. Improper wiring can lead to ground loops or even short circuits. While fixing vintage gear is fulfilling, sometimes external digital interference or connection exceptions might lead you to mistakenly assume an analog hardware fault exists.
Essential tools for precision hardware repair
A well-equipped technician needs specific tools to handle DIN plug connections effectively without damaging the sensitive plastic or metal casings. A high-quality soldering station with adjustable temperature control is mandatory for delicate pins. Furthermore, having thin-gauge, lead-free solder prevents bridging between adjacent pins, which is a common error for beginners. Using a magnifying lamp provides the necessary clarity to inspect hairline fractures in the solder. Remember that preparation is half the work; cleaning contacts with high-purity isopropyl alcohol removes oils that inhibit conductive performance and longevity after your repair is finished.
💡 Pro tips for successful soldering
- Always tin your iron tip before starting the repair process.
- Use a heat-shrink sleeve to provide strain relief near the plug base.
- Avoid overheating the pins, as they may loosen in the plastic housing.
- Verify the pinout map twice before finalizing the permanent connections.
If you run a repair shop, you understand that customer visibility is just as important as technical precision. Even if you are a master of electronics, you still need local SEO leads to find new clients who require vintage equipment restoration. Many consumers search for professional repair services nearby but fail to find the right experts due to poor online presence. By focusing on your service location and specific skills, you ensure that your technical expertise matches the needs of local hobbyists looking to revive their analog systems.
How to verify electrical continuity
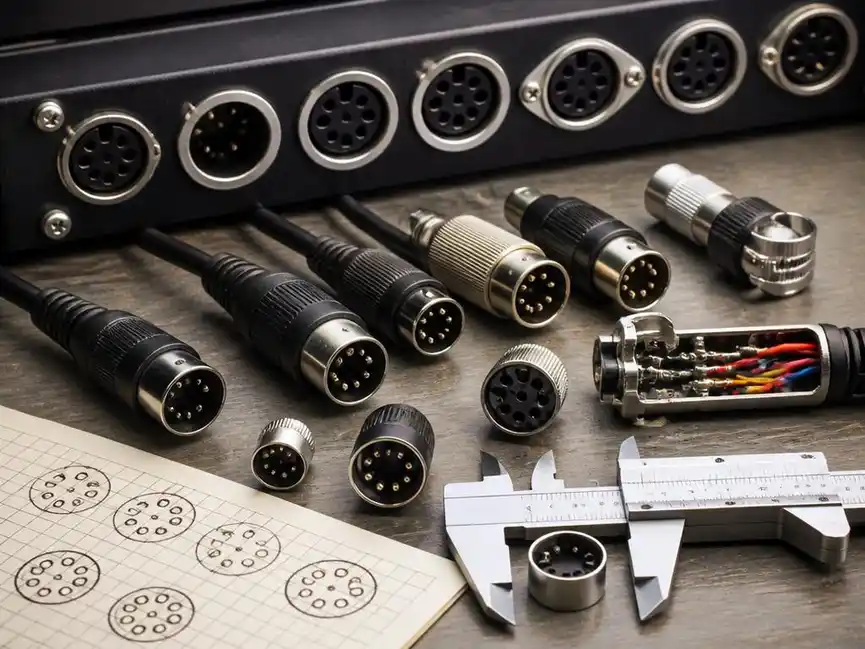
Verification is the most critical stage of the process before reconnecting any component to power. Using a multimeter in continuity mode, check each pin against its corresponding wire at the other end of the cable. Any readings above a few ohms typically suggest a poor connection that needs re-soldering. If you detect a cross-connection, you must strip the cable back and verify the wiring scheme again. This patience prevents equipment damage that could occur if incorrect voltages are routed through the wrong signal path, ensuring your vintage hardware continues functioning correctly for years.
✅ Key takeaways for hardware maintenance
Maintaining DIN plug connections requires routine cleaning and careful physical handling. When repairs become necessary, ensure you possess the right tools to maintain signal integrity. Professional success often relies on both technical skill and the ability to attract clients who value your craft. Remember that online business visibility plays a significant role in connecting you with the right projects. Treat every connection with care, document your work, and always test your results before final assembly to guarantee high-performance outcomes for your audio or data systems.
While the industry has largely shifted towards modern digital protocols, the legacy of DIN interfaces remains strong in the audiophile community. Mastering these specific DIN plug connections grants you the ability to preserve historical equipment that would otherwise be discarded. Keep your documentation organized, including pin diagrams for various models like the 5-pin or 7-pin configurations. By focusing on quality materials, such as oxygen-free copper cabling and gold-plated pins, you elevate your repairs from functional to superior. This approach ensures that your work stands the test of time, reflecting both your dedication and your technical prowess.
As you continue to refine your repair techniques, consider documenting the process for future reference. Many repair technicians find that creating a personal library of pinout configurations saves massive amounts of time during future troubleshooting sessions. If you find yourself frequently working on specific brands, keep spare parts in stock to minimize downtime. Consistent maintenance routines and an organized inventory management system distinguish a hobbyist from a true professional. With the right strategy, your repair workbench will become a hub for high-quality restoration, ensuring that vintage technology remains a vital and functional part of the modern creative experience.
Final considerations for lasting connections
Ultimately, the longevity of your repair depends on the quality of the physical join and the protection provided against environmental factors. Always use high-quality heat shrink to protect the solder points and ensure the strain relief mechanism of the plug is securely clamped onto the cable jacket. This simple step prevents internal wires from pulling away from the pins when the cable is moved. By following these rigorous standards, you provide reliable solutions that honor the history of the equipment while utilizing modern repair practices to ensure optimal performance for years to come.
⚠️ Warning: Common repair hazards
Never attempt to solder while the equipment is plugged into a power source. Residual capacitance in vintage power supplies can deliver a nasty shock even after disconnection. Always discharge capacitors if you are working on internal circuits associated with the ports. Additionally, avoid inhaling solder fumes by using a dedicated fan or smoke extractor; lung health is as critical to your career longevity as the technical quality of your repairs. Respect the hardware and your own safety, as both are essential to a sustainable, professional, and rewarding workflow in electronics restoration.
Final testing should involve a multi-step check of both signal quality and structural integrity. Play a test signal through the connected devices and listen for any crackling or phase issues that might indicate an internal short or a bad solder joint. Move the cable gently in different directions to verify that the internal connections are truly stable. Once you are confident, secure the outer shell of the connector. A job well done provides the satisfaction of restoring functionality to equipment that has been silent for years, successfully bridging the gap between past innovation and present day utility.
Expanding your reach as a technician involves a dual focus on capability and marketing. When you showcase your ability to fix complex vintage interfaces, you position yourself as a specialist in a niche market. This professional reputation builds trust with clients who are wary of inexperienced hands touching their prized audio gear. By combining technical excellence with a clear, honest communication style, you create a loyal client base. The journey of mastering these legacy connections is ongoing, but the rewards of providing high-quality, reliable service to your community are immense and highly valued in today’s throwaway culture.
